What’s New in Pointscene? (previous releases)
Release Notes 17.4.2020
Pointscene now supports WMS web services for ortho imagery, viewing single georeferenced 360° images and users also get notified by email for completed data processing, in addition to some minor adjustments and bug fixes.
WMS web map service support
Pointscene now publishes WMS web services including all of your site’s ortho photos that have sharing set on. Our WMS also supports multiple map projections / EPSG codes.
You must have ortho photos on the Site to use the “publish WMS” feature. Learn how to upload ortho photos.
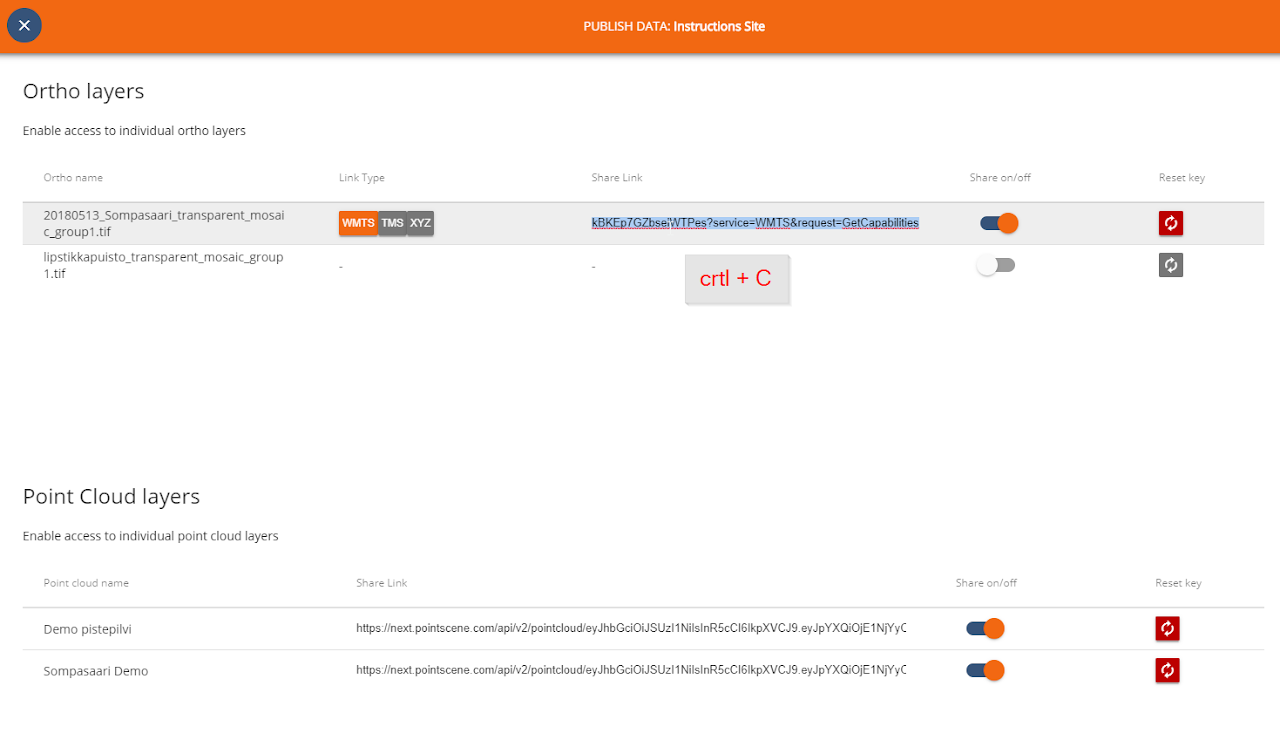
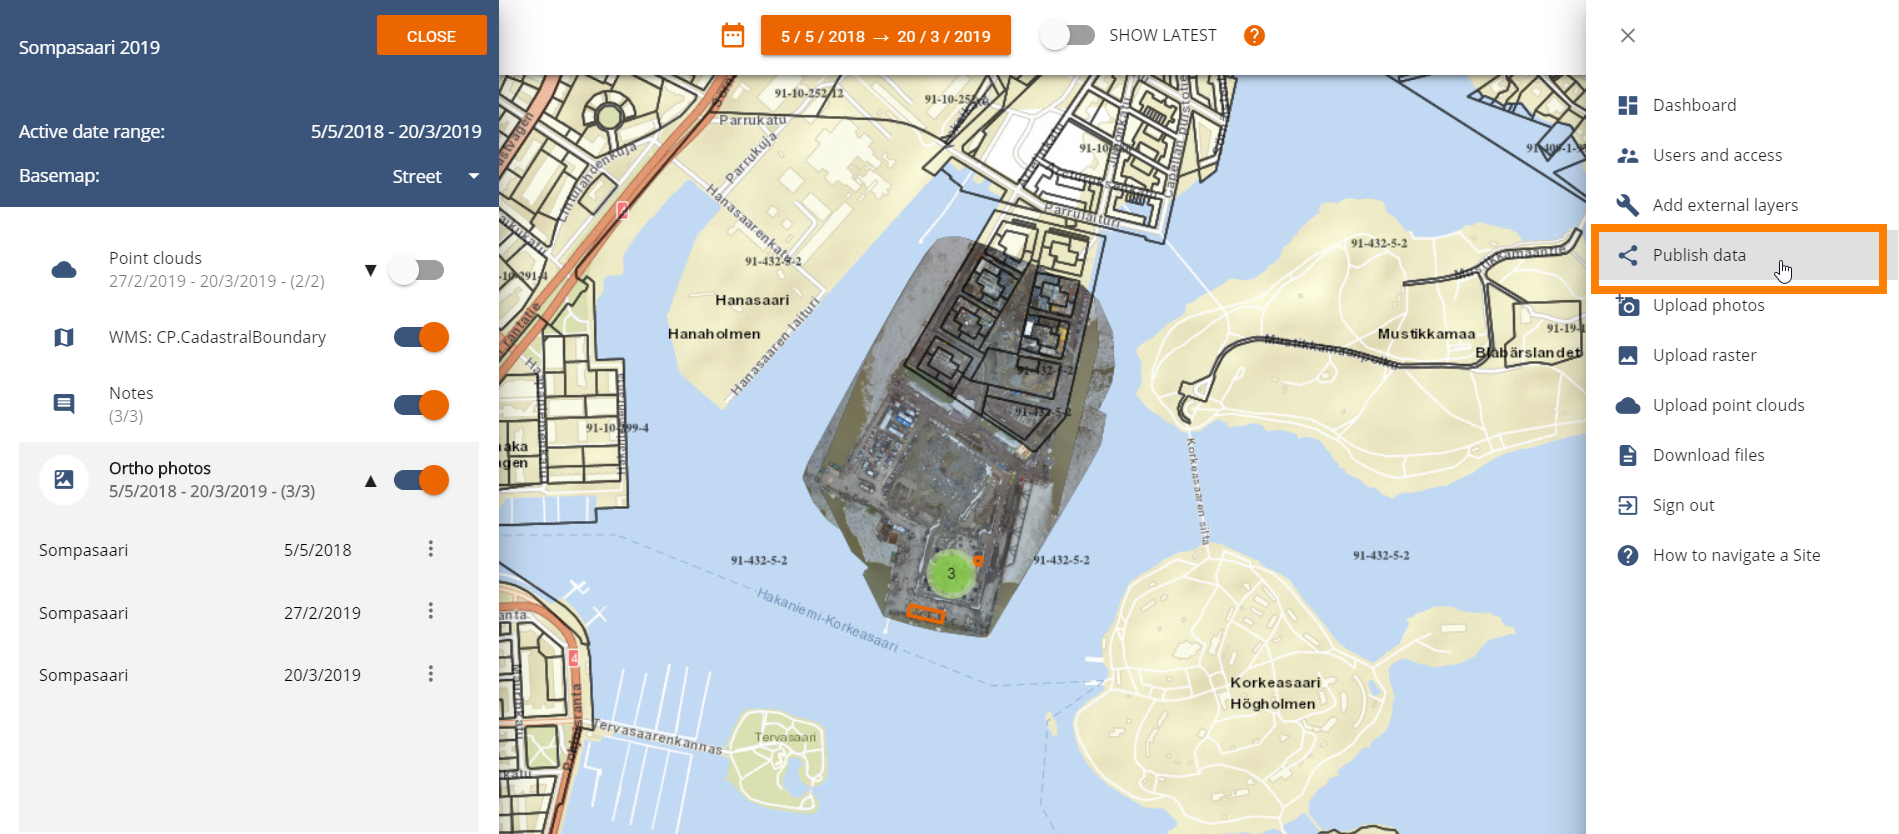
Go to Publish data
Turn “Share on” for the layers to want to share. Select WMS button and copy the link. Now you can add the link to any Map / GIS software supporting standard WMS web services.
The shared link will provide WMS access to ALL the datasets that have the “Share on” option selected. It doesn’t matter which layer link you use.
Note! All changes in sharing settings might take up to 15 minutes to be activated. If the link doesn’t work, try again in 15 minutes.

Note! The WMS share link length — being more than 248 characters — unfortunately causes issues when using in Trimble Civil / Trimble Locus software (known issues). Trimble/Tekla software are the most common software with this namespace restriction, but this will likely be fixed in the next Trimble software versions. So please update your software to the newest version always when possible. If you find other solutions that have this restriction, please let us know at support@pointscene.com.
Supported EPSG codes for WMS (requires the “automation license” activation):
“EPSG:3857”, “EPSG:3067”, “EPSG:3873”, “EPSG:3874”, “EPSG:3875”, “EPSG:3876”, “EPSG:3877”, “EPSG:3878”, “EPSG:3879”, “EPSG:3880”, “EPSG:3881”, “EPSG:3882”, “EPSG:3883”, “EPSG:3885”, “EPSG:3885”, “EPSG:5972”, “EPSG:5973”, “EPSG:5974”, “EPSG:5975”, “EPSG:3006”, “EPSG:5846”, “EPSG:5847”, “EPSG:5848”, “EPSG:5849”, “EPSG:5850”, “EPSG:5851”, “EPSG:5852”, “EPSG:5853”, “EPSG:5854”, “EPSG:5855”, “EPSG:5856”, “EPSG:5857”, “EPSG:5110”.
360 Images
Now you can upload and see individual 360 images to Pointscene in addition to the “street view” imagery data. The upload process is exactly the same (https://pointscene.com/instructions/360-panorama-photos-upload/) and the system recognizes the images as an individual when the timestamp between pictures is bigger than 30 seconds.
Email notification
Once you upload a raster or point cloud, there is a processing time after the file is in our system. This processing time is depended on the data, so it varies between datasets. We added a feature, where the user get an email when the data processing is done, so that you don’t need to wait and stick around and wonder when the processing is done. The email arrives from the address: no-reply@mg.pointscene.com.

Other Changes
We removed the option for Hillshade upload and changed the name of Ortho photo to “Aerial”.
This is the new option to choose when uploading ortho mosaic map data (drone 2D map).
The other option “Map” is only for raster map drawings, as it is semi-transparent and is not able to be published as WMTS etc. web services.
Release Notes 10.12.2019
Pointscene Next now supports compilation WMTS / TMS / XYZ links. In other words Pointscene Next provides a site level access to all ortho photos via just one link.
This one link contains:
- Individual layers separately: Each ortho photo as its own layer, select by layer name
- Compilation layer: All site ortho photos shown as a joint layer, with the newest as topmost layer
- Composite layer: Same as compilation layer, but each ortho photo has a colour and date to separate when the photos where taken
How to access link?
- Go to Sites, select your site
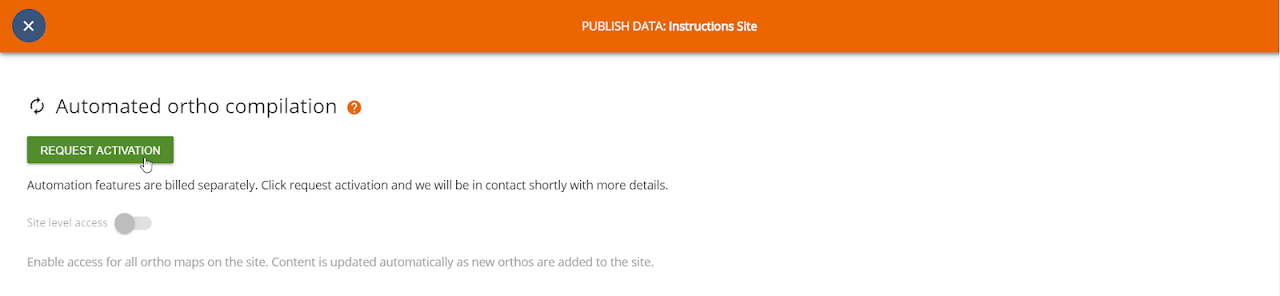
- Open Options and select Publish data
- Choose Request Activation if not already activated
- Turn Site level access on and off from the switch
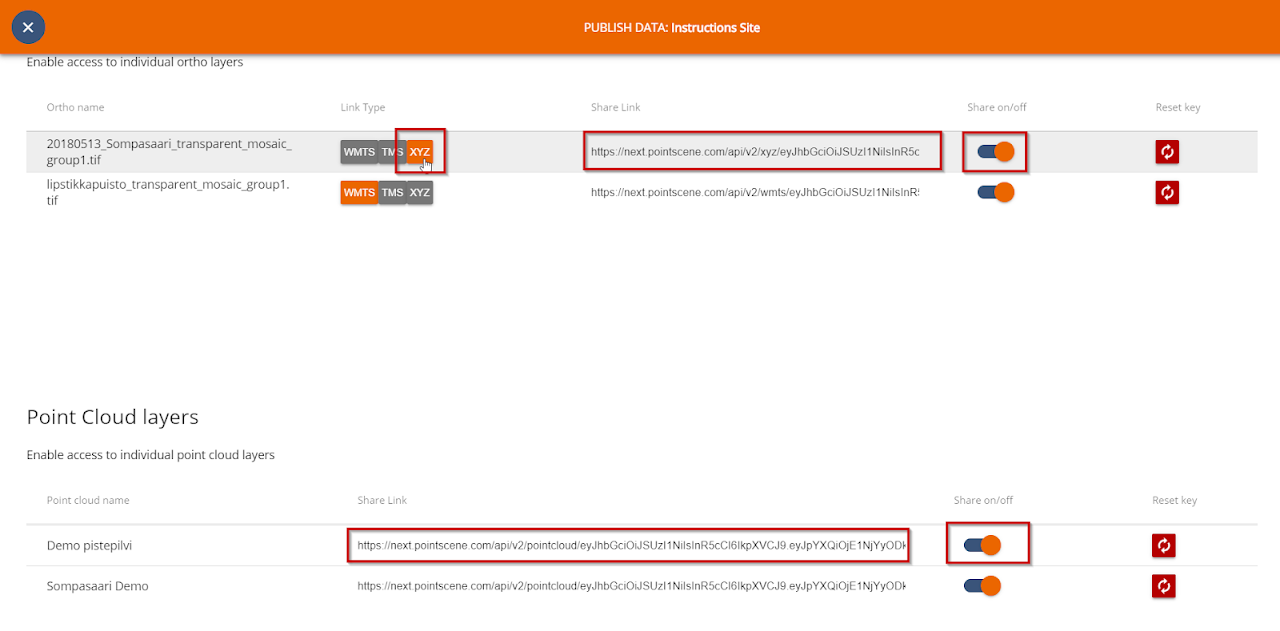
- Choose WMTS, TMS or XYZ
- WMTS has all individual and compilation layers as options to choose from
- TMS and XYZ are only links to the compilation layers. Use the old publish links for individual usage.
- Copy-paste to another software
- Any updates will be automatically updated to our choice of software without any actions. Sometimes cache settings might prevent some layers to be unseen. Clear cache if necessary or add the link again to reset settings.
- Access all your data at once!
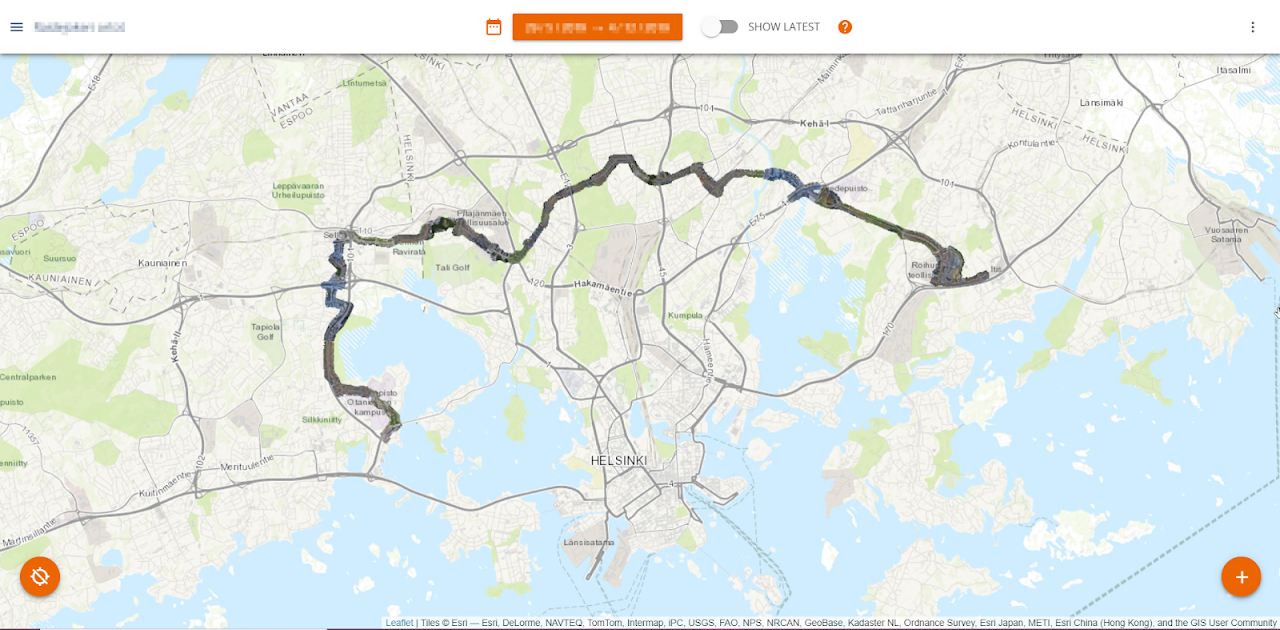
- Improved experience e.g. in Infrakit with all areas seen at once!

The access link is done to all orthophotos in your site and will be seen the same way as in Pointscene Next interface: the newest layer as the topmost layer.
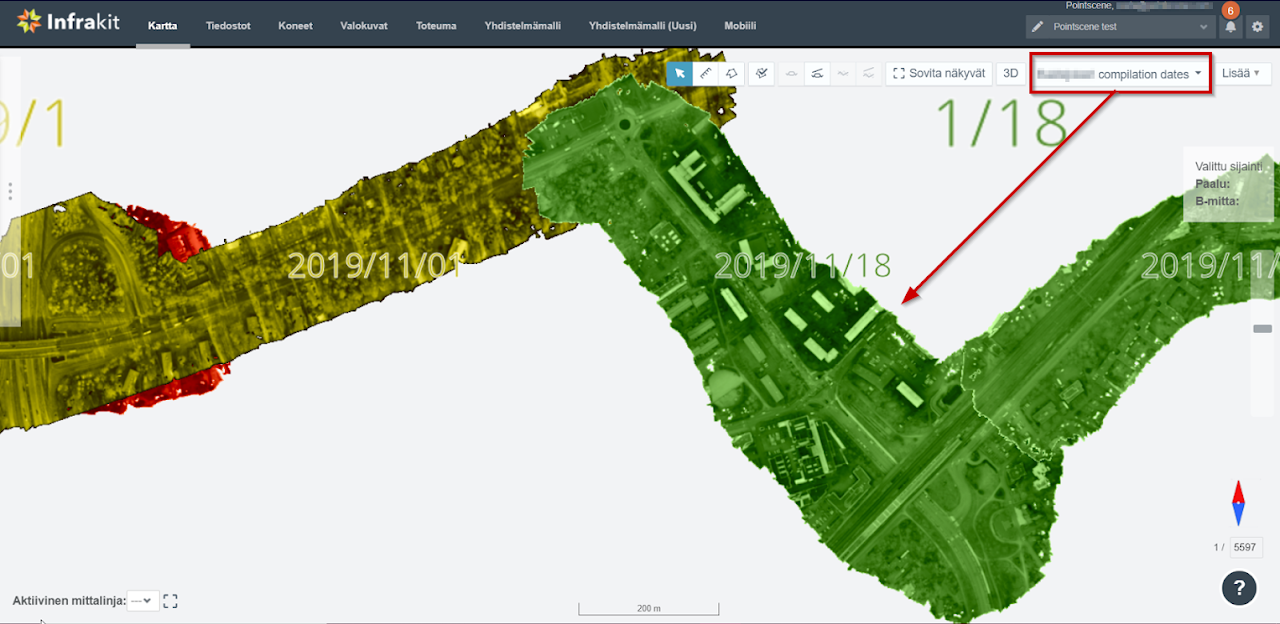
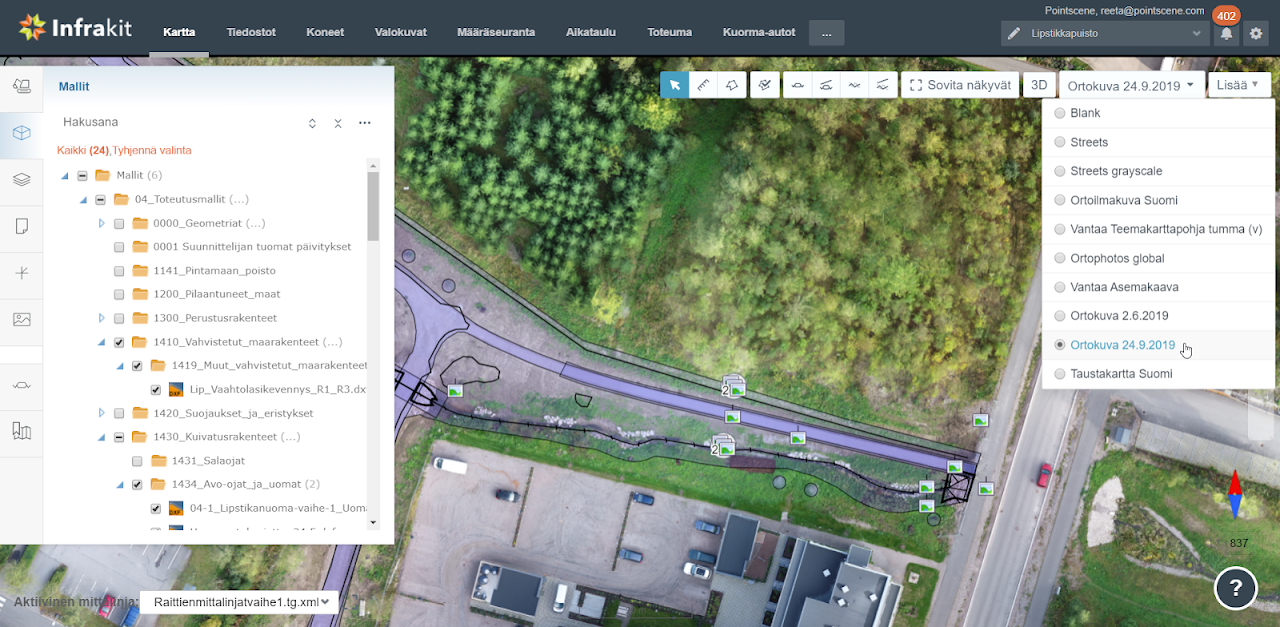
Infrakit view of the composite layer.
Add XYZ link in project settings –> Layers and the data is used via base map selection.
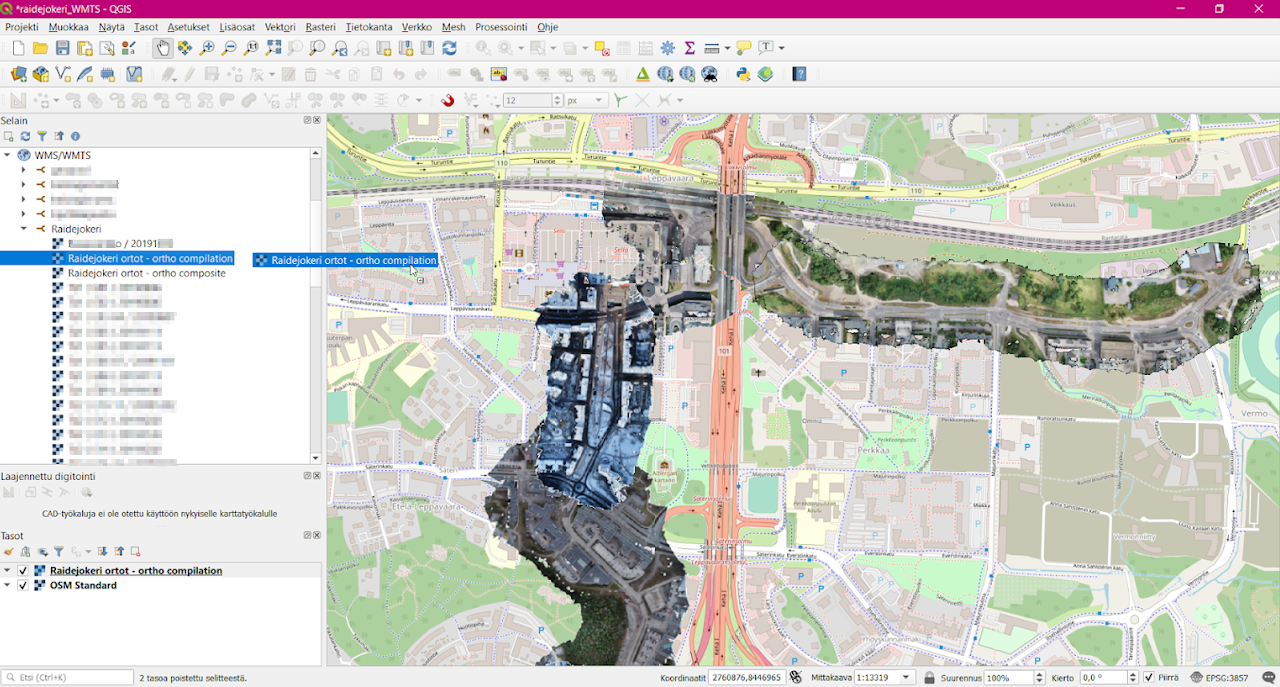
QGIS uses WMTS links and after adding the connection, you can drag and drop the desired layers, compilation or individual ones.
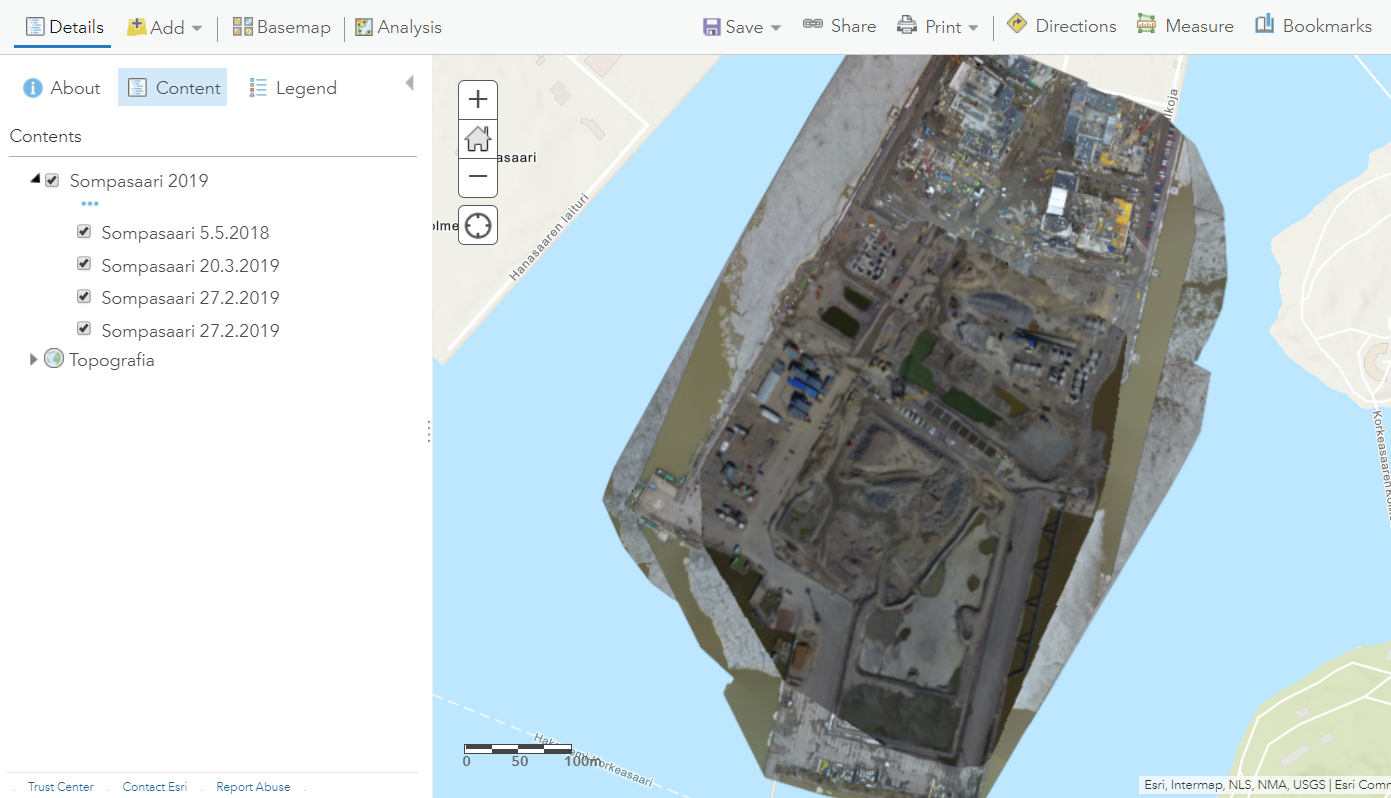
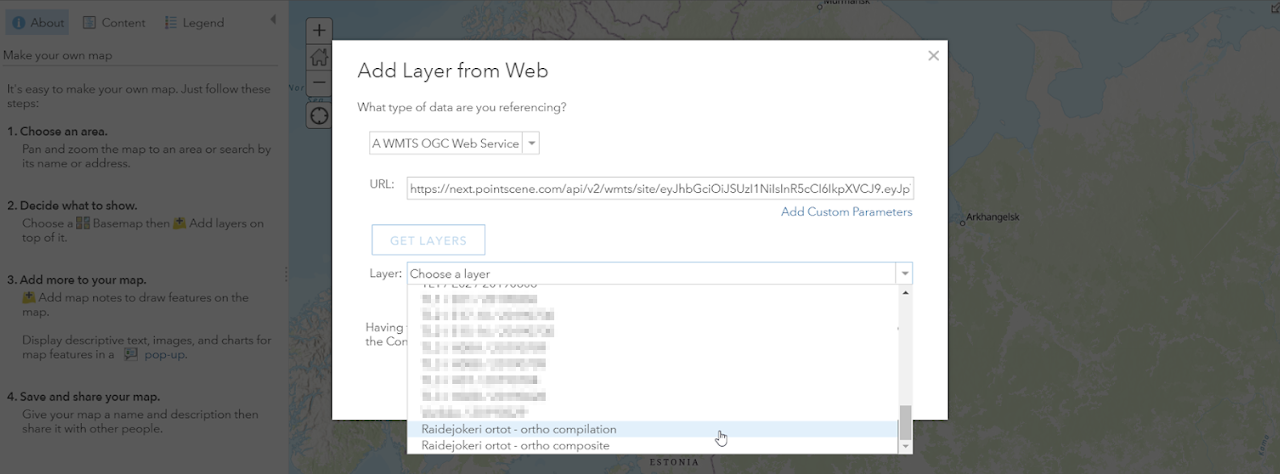
Adding WMTS to ArcGIS Online. Add the same link again (Add layer from web) to have multiple different layers in one map.
This feature is part of our automation package, that is not included in the basic licence. Click “Request Activation” for more information or contact sales@pointscene.com
Release Notes 22.11.2019
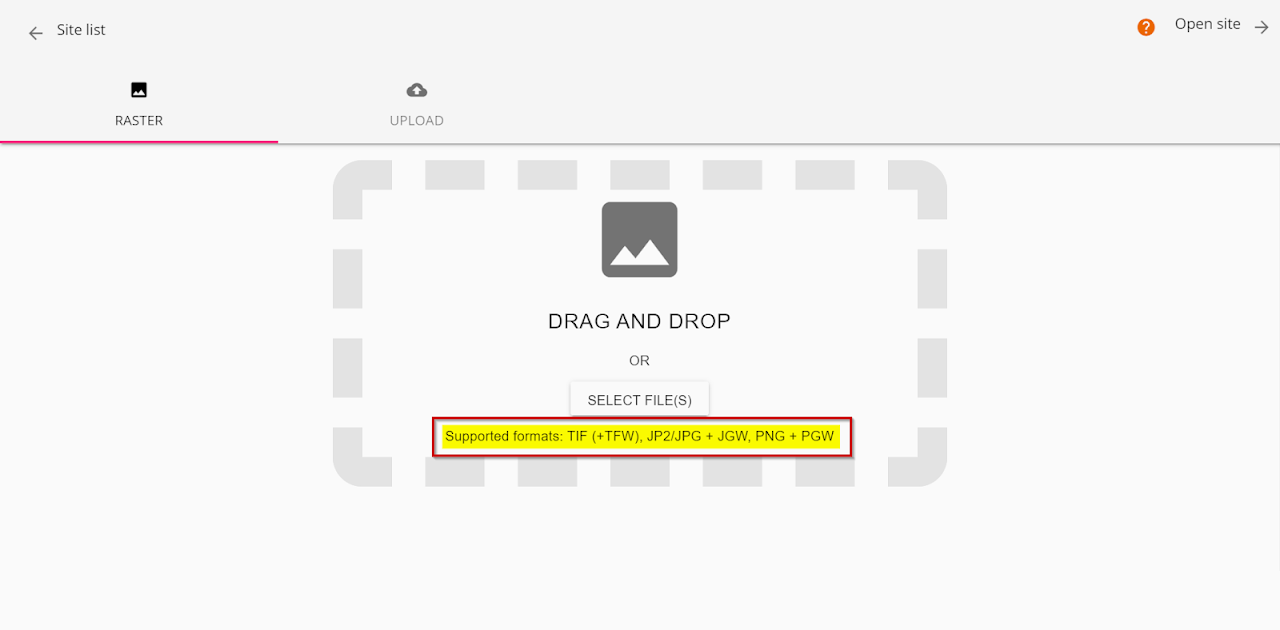
Pointscene Next now supports jp2, jpg and png (+ world files) rasters. Add raster from Upload raster.
Infrakit support
Infrakit has released their 3.6.0 version, that brings many new features working together with Pointscene!
Infrakit release includes:
- Added Pointscene point clouds integration (3D visualization) (only in web mercator projection!)
- Added an user interface to manage point clouds (3D visualization)
- Added an user interface to manage basemaps using XYZ-links from Pointscene
How to link Pointscene and Infrakit:
1. Go to Pointscene – Sites and from the right right panel click Publish data

2. For ortho map (2D) Click Share on/off and then choose XYZ and then copy the link (crtl+C, or right click + Copy)
3. For point clouds Click Share on/off and then copy the link (crtl+C, or right click + Copy)
Infrakit supports only web mercator projection (epsg: 3857) for point clouds! Please upload a new point cloud in the correct projection, or contact support@pointscene.com to have the conversion done for your data by Pointscene.
4. For ortho maps open project settings and layers and then add name and XYZ-link to the provided box.

5. Now the basemap is added to the project and everyone can us it from the basemap selection tab in the Map-view.
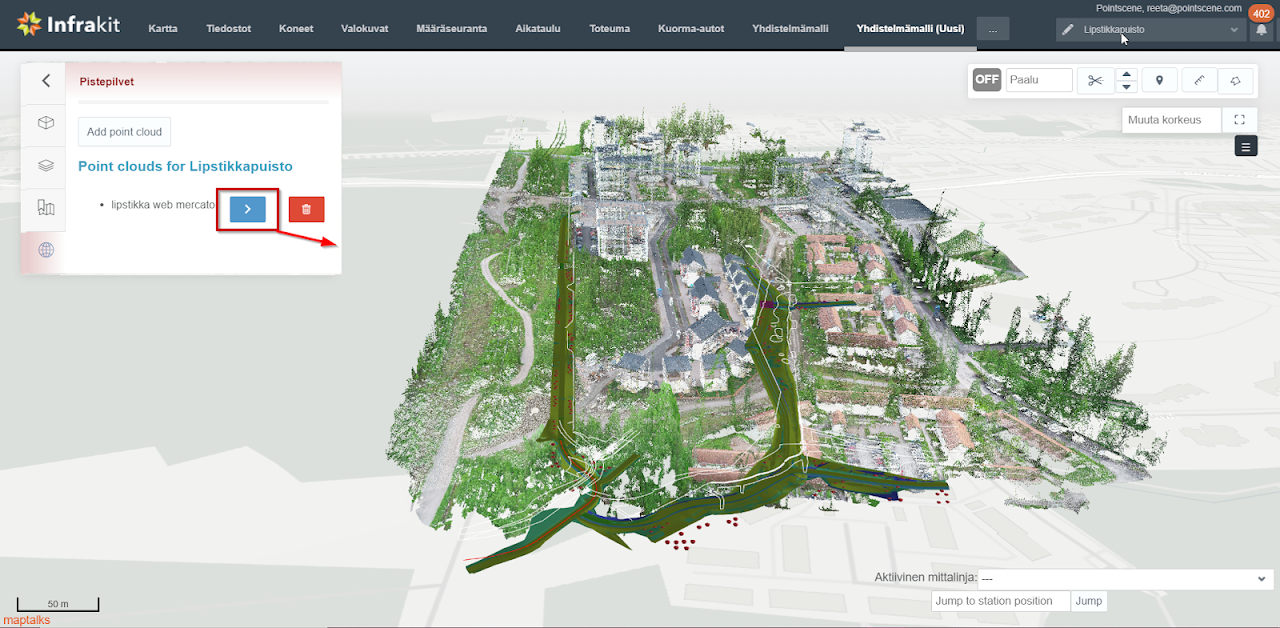
6. For the point clouds open the new 3D visualization tab and then the click on the globe-icon on the left tab.
7. Click on Add point cloud, provide a name and copy the point cloud link and click Save.

8. Now you can select the point cloud to be visualized by using the blue arrow.
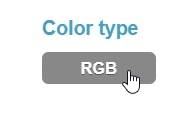
9. You can visualize the point cloud with elevation values by clicking on the Color type:


Release Notes 20.8.2019
- An Ortho view is generated for all point clouds uploaded
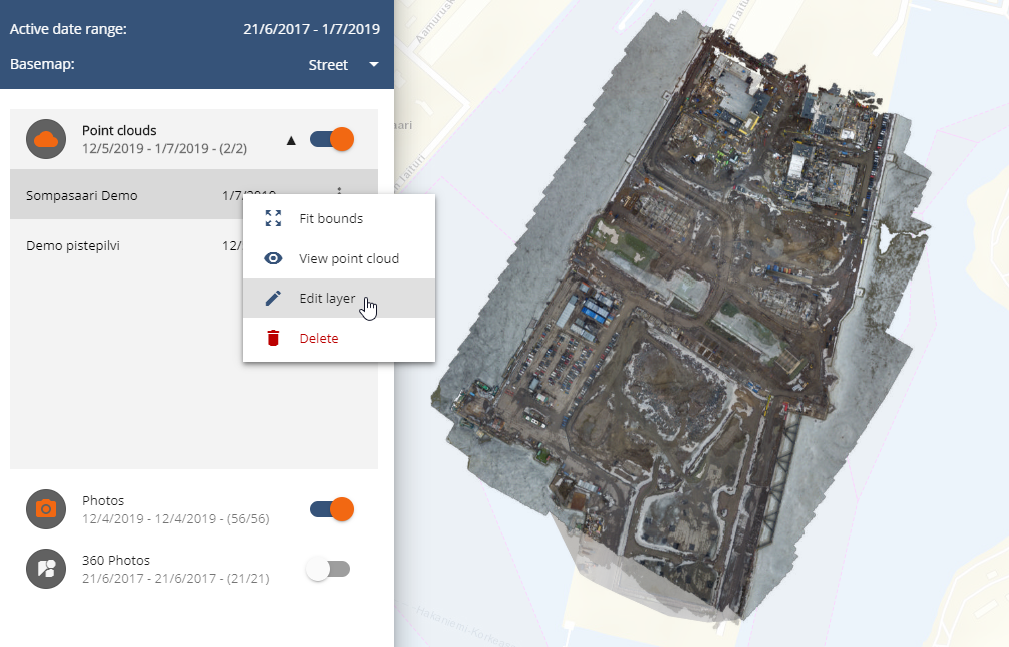
- Editors can change the layer name and delete the layer from map view (will be stored in backup database)
3. You can turn Notes on and off on the map site view
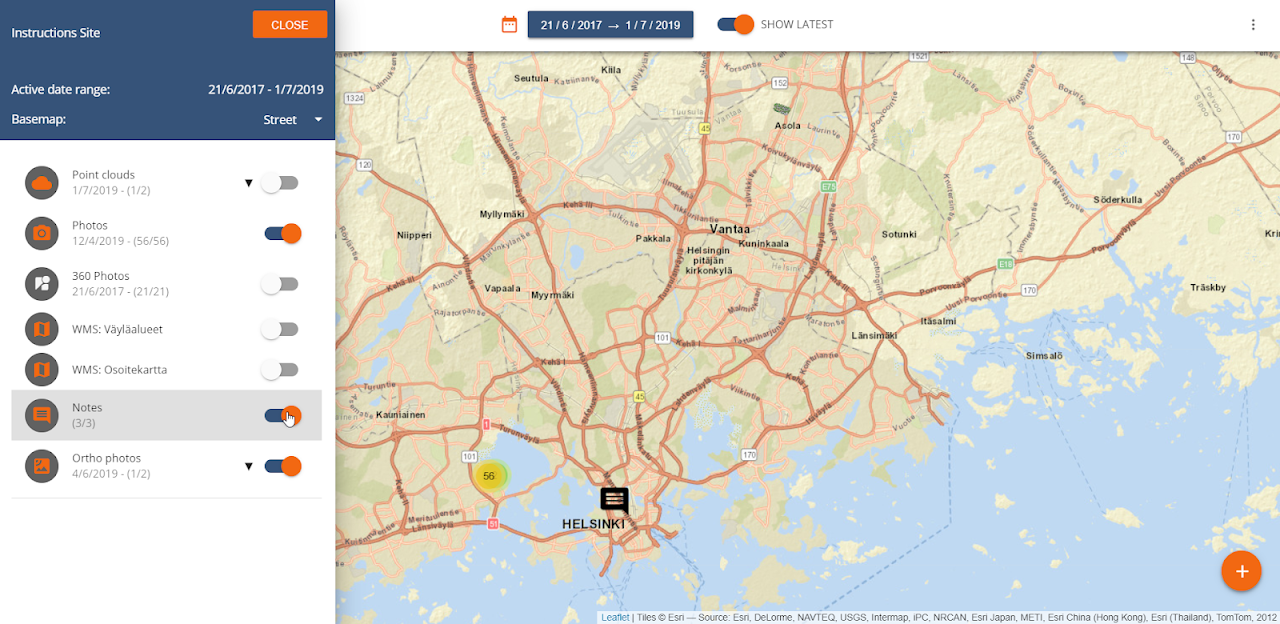
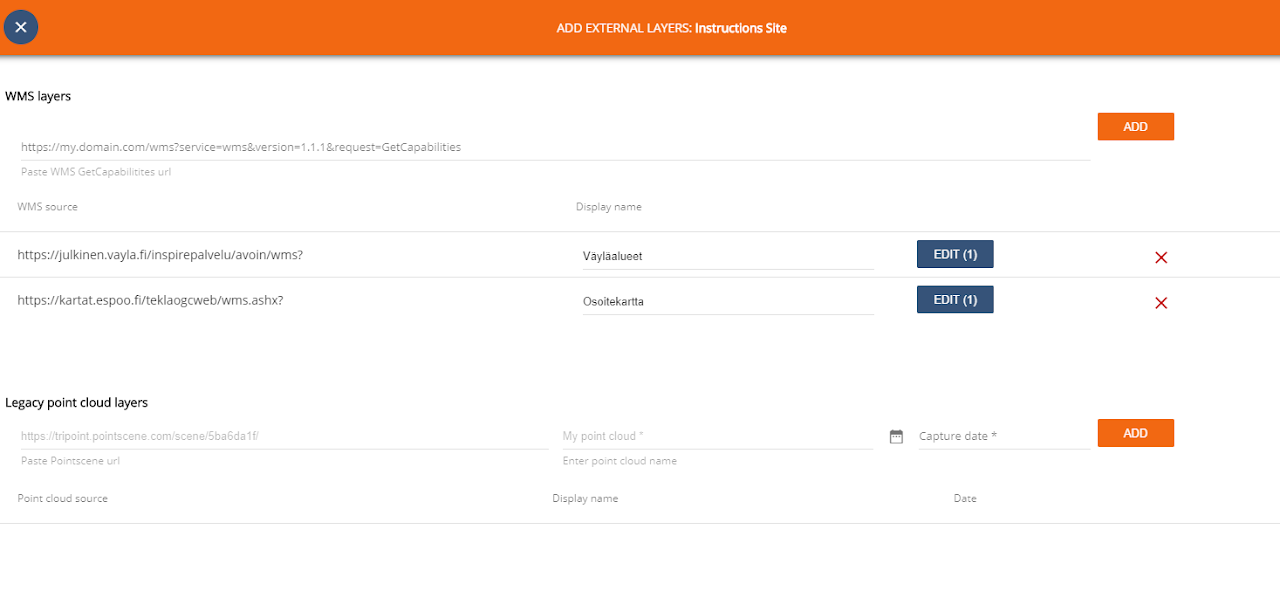
4. Add external layers replaces previous Layers and is for WMS layers and legacy point cloud layers.
Only change is the name of the option in the right Options-pane.
5. Publish data replaces WMTS publishing previously found in Layers selection in Options-pane
The interface of the Publish data is new. You can easily copy-paste the link and share to users. Note that the links are now longer, as we updated the API authentication to be more secure.