
Surface models – Contours and Elevation
Pointscene supports surface models in GeoTIFF and LandXML formats. In these instructions we’ll be focusing on the usage of GeoTIFF surfaces.
Data acquisition
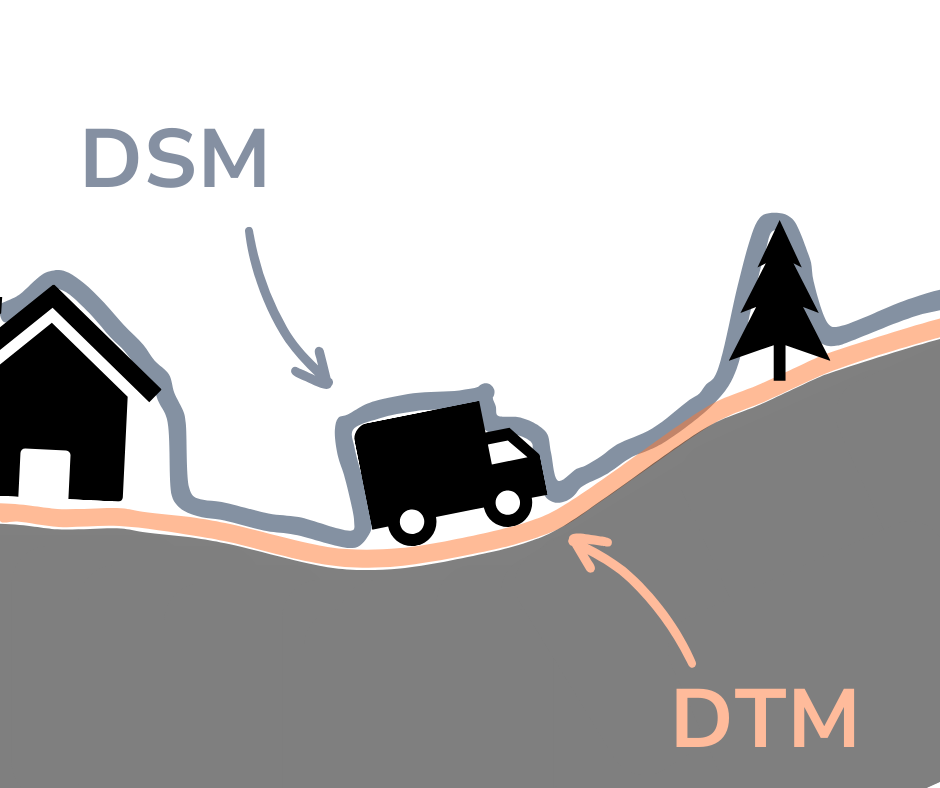
Surface models are typically collected with drones or laser scanners. The raw data can be processed photogrammetrically or by processing the point cloud. The most common output is a Digital Surface Model, DSM, which represents the 3D shapes of the captured area in a raster. With a classified point cloud (separating the ground points) you can create a Digital Terrain Model, DTM.
In Pointscene you can use the DSMs and DTMs in many ways.
1. Most of the time surface models are used for volume calculations. The volumes can be calculated from one dataset, or comparing two. Read more
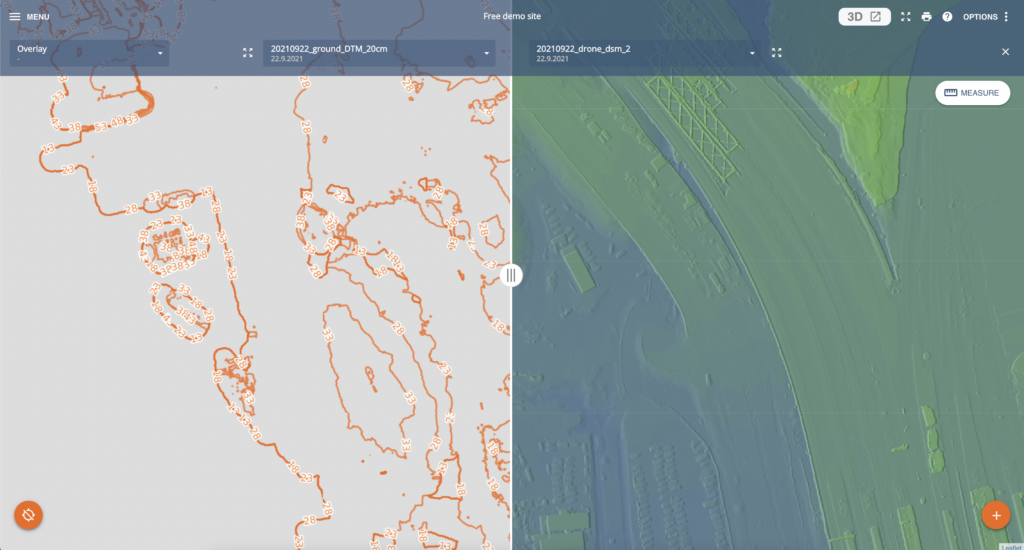
2. 2D visualization of the terrain gives great insight addition to the orthophoto. In Pointscene you can visualize your surfaces with elevation color or contour lines. Turn on the layer in menu and select OPTIONS to select contour lines or elevation colors.

You can also adjust the min-max values. In contour lines, it hides all lines under or above min-max. In elevation colors, all values below min are blue, and value about max are red. You can see the default range for reference or RESET back to defaults.


You can share surfaces the same way as orthophotos. You don’t have to wait 15 minutes for the surface WMS layers.
