
How to add WMS to Microstation
Pointscene supports custom coordinate systems for WMS and the default is EPSG:3857. If your local projection is not supported, please contact support@pointscene.com and we’ll fix it!
- Copy WMS link from Pointscene (Site Options, Publish data)
- In Microstation, make sure you have the correct coordinate system selected for your model
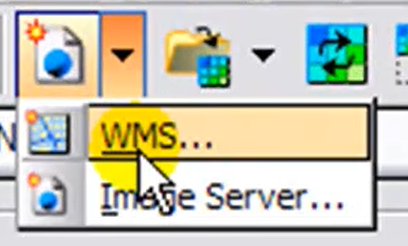
- In Microstation (V8I–>) open the Raster Reference dialog

- From the Raster Reference dialog select the drop-down arrow for a new connection and select WMS…. The WMS Map Editor dialog will appear.
- From the WMS Map Editor dialog the Servers button. The Servers Manager dialog will appear

- Click on the add Server and copy-paste the link you copied from Pointscene and click OK

- In the Available Layers window selected one or multiple layers you want to add to the map and click Add to map
- Click Save and Attach.. and give it a name (name.xwms)
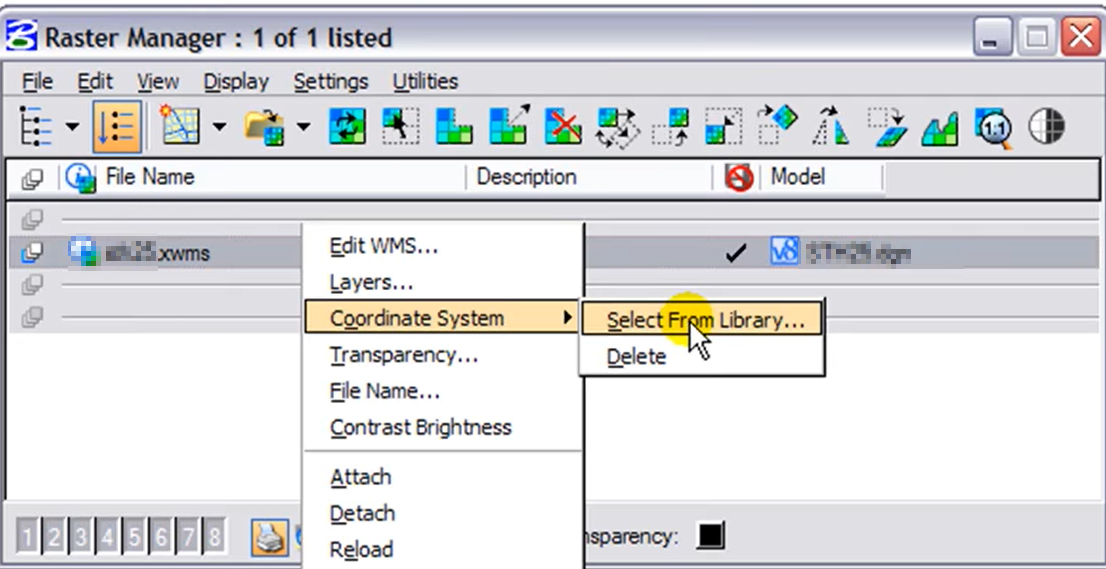
- Control your layers in the Raster Manager window. Right-click the name.xwms file and select Layers

- Set the coordinate system by again right-clicking and selection Coordinate System –> Select from Library..
- Now your WMS layers should be align within your map and other data.