
Georeferencing design files with QGIS
When it comes to a construction project, the more information about a job site you have, the better decisions you make. Only combining the right data from multiple sources provides the best and accurate understanding of the situation.
The essential part of the process is georeferencing the data before even trying to overlay them together. During georeferencing you’ll assign a real world coordinates to a map or an image. This article will show you how to georeference a construction site map using an opensource software QGIS.
Data
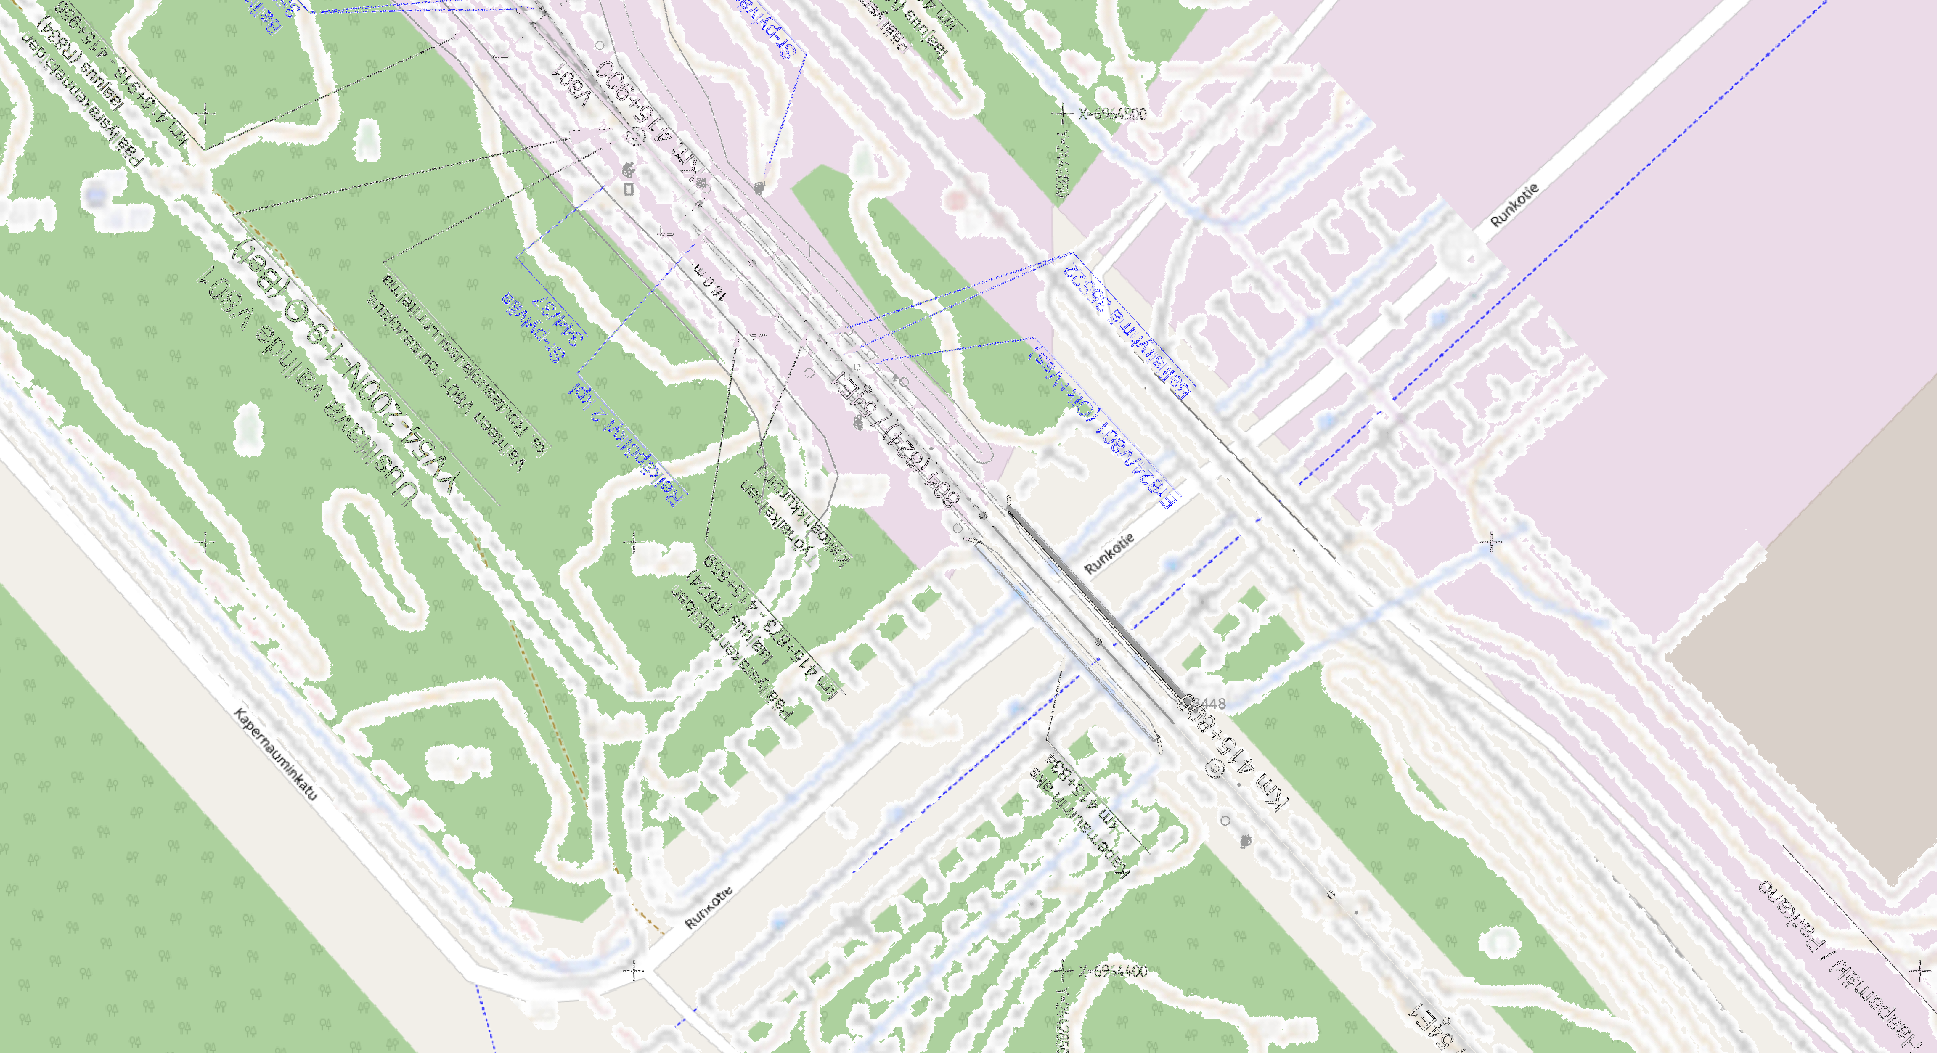
For this project, I worked on a construction site map in PDF format. In this case, there is a grid with coordinates in Finnish KKJ2 (EPSG: 2392) coordinate system that can be used for georeferencing. An image may also be georeferenced by matching easily identifiable features to an existing georeferenced dataset (e.g. Google Street Map).
Settings
- Open georeferencer from Raster -> Georeferencer
- Open Settings -> Transformation settings
- Set the transformation type to Helmert.
- Set Target SRS to KKJ2 (EPSG code 2392).
- Choose the output name of the file and where to save it.
![]()
Note: If the image you’re georeferencing covers a large area, I recommend to set custom target resolution. Leaving default values unchanged produces the output file size will be too big.
- Check Load in QGIS when done and save changes.
Adding reference points
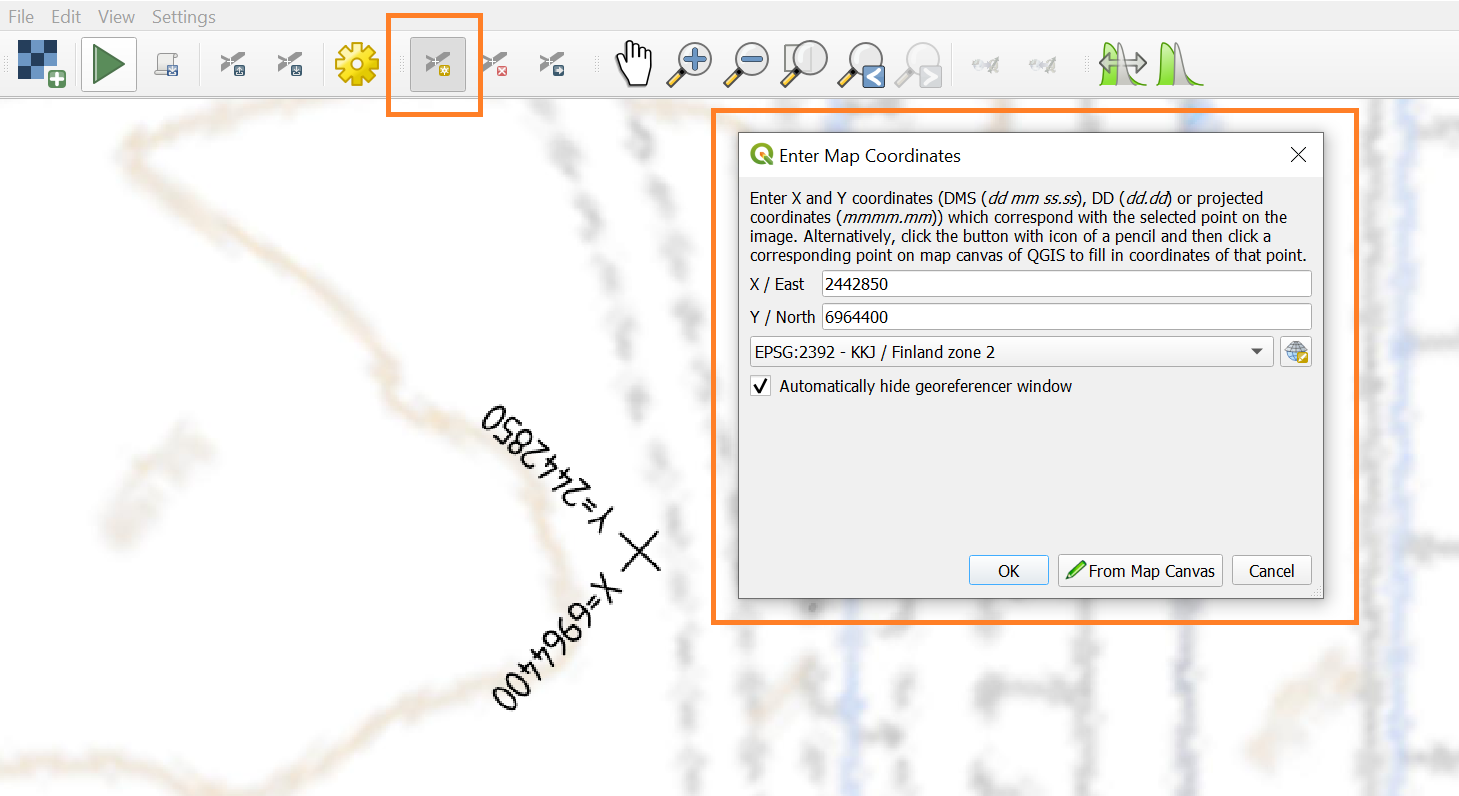
- Maps and plans show the coordinates of specific points by the sign of the cross. To add reference points (GCPs) use Add point button. Zoom into the cross with coordinates.
- Left-click in the middle of the cross and manually enter coordinates written next to it.
- Click Ok to approve point. If you made mistake, you can delete the point or move it. Repeat this procedure for all remaining points. Remember to mark at least 3 points. Created reference points appear in the GCP table at the bottom of the window.
- When you finish entering GCPs, go to File-> Start Georeferencing or press the green Play button in the control pane.
- The georeferencing is finished and resulting raster will be loaded to main QGIS window. It’s always a good idea to check if the result is accurate. Open second data set (e.g. Google Satellite map) and set transparency to raster.
Setting transparency
From Settings, select Raster properties and go to Transparency tab. Click green plus- Add values manually and enter RGB values for background colour (255, 255, 255 for white colour). Accept changes.
![]()