
Changing coordinates of geotagged photos
When taking geotagged photos with smartphones, cameras, and 360 cameras without accurate positioning, it is good to be able to edit the photo locations at the office. To edit the photo geotag, you need to edit the exif metadata of the photo. You can update them with a script or with this OpenStreetMap Editor tool without any coding.
A typical situation is that you collect e.g. 360 photos with a camera that is connected to your phone. Once to turn on interval shooting and put your phone in your pocket your location might not update anymore. So you will end up in a situation where all photos have the same geotag and therefore the same location. With these instructions, you will be able to change the location and save the new location directly into the original photos.
Installation of free and open software:
- Install JOSM (info: https://josm.openstreetmap.de/)
- The recommended way is to use Web start (https://josm.openstreetmap.de/wiki/Download#Webstart)
- Install OpenWebStart (https://openwebstart.com/)
- Download josm.jnlp file

- The recommended way is to use Web start (https://josm.openstreetmap.de/wiki/Download#Webstart)
-
-
- Open and follow the instructions.
-
- Open JOSM
- Press F12 or click Edit > Preferences (here you can change the language too!)
- Select Plugins and download list
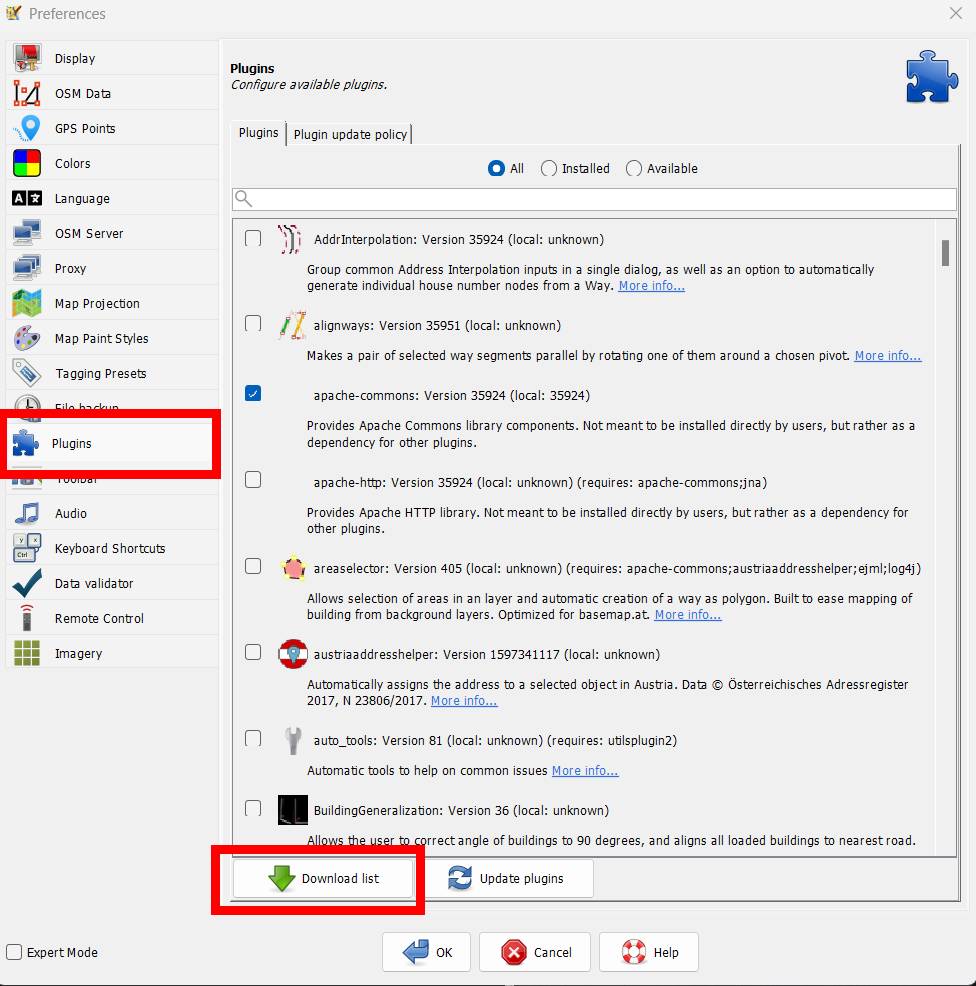
- Search “Photo” and select photo_geotagging and photoadjust. Click Update Plugins, then OK and close Preferences.

- If the following steps don’t work, please restart JOSM.
Using JOSM to change photo geotags
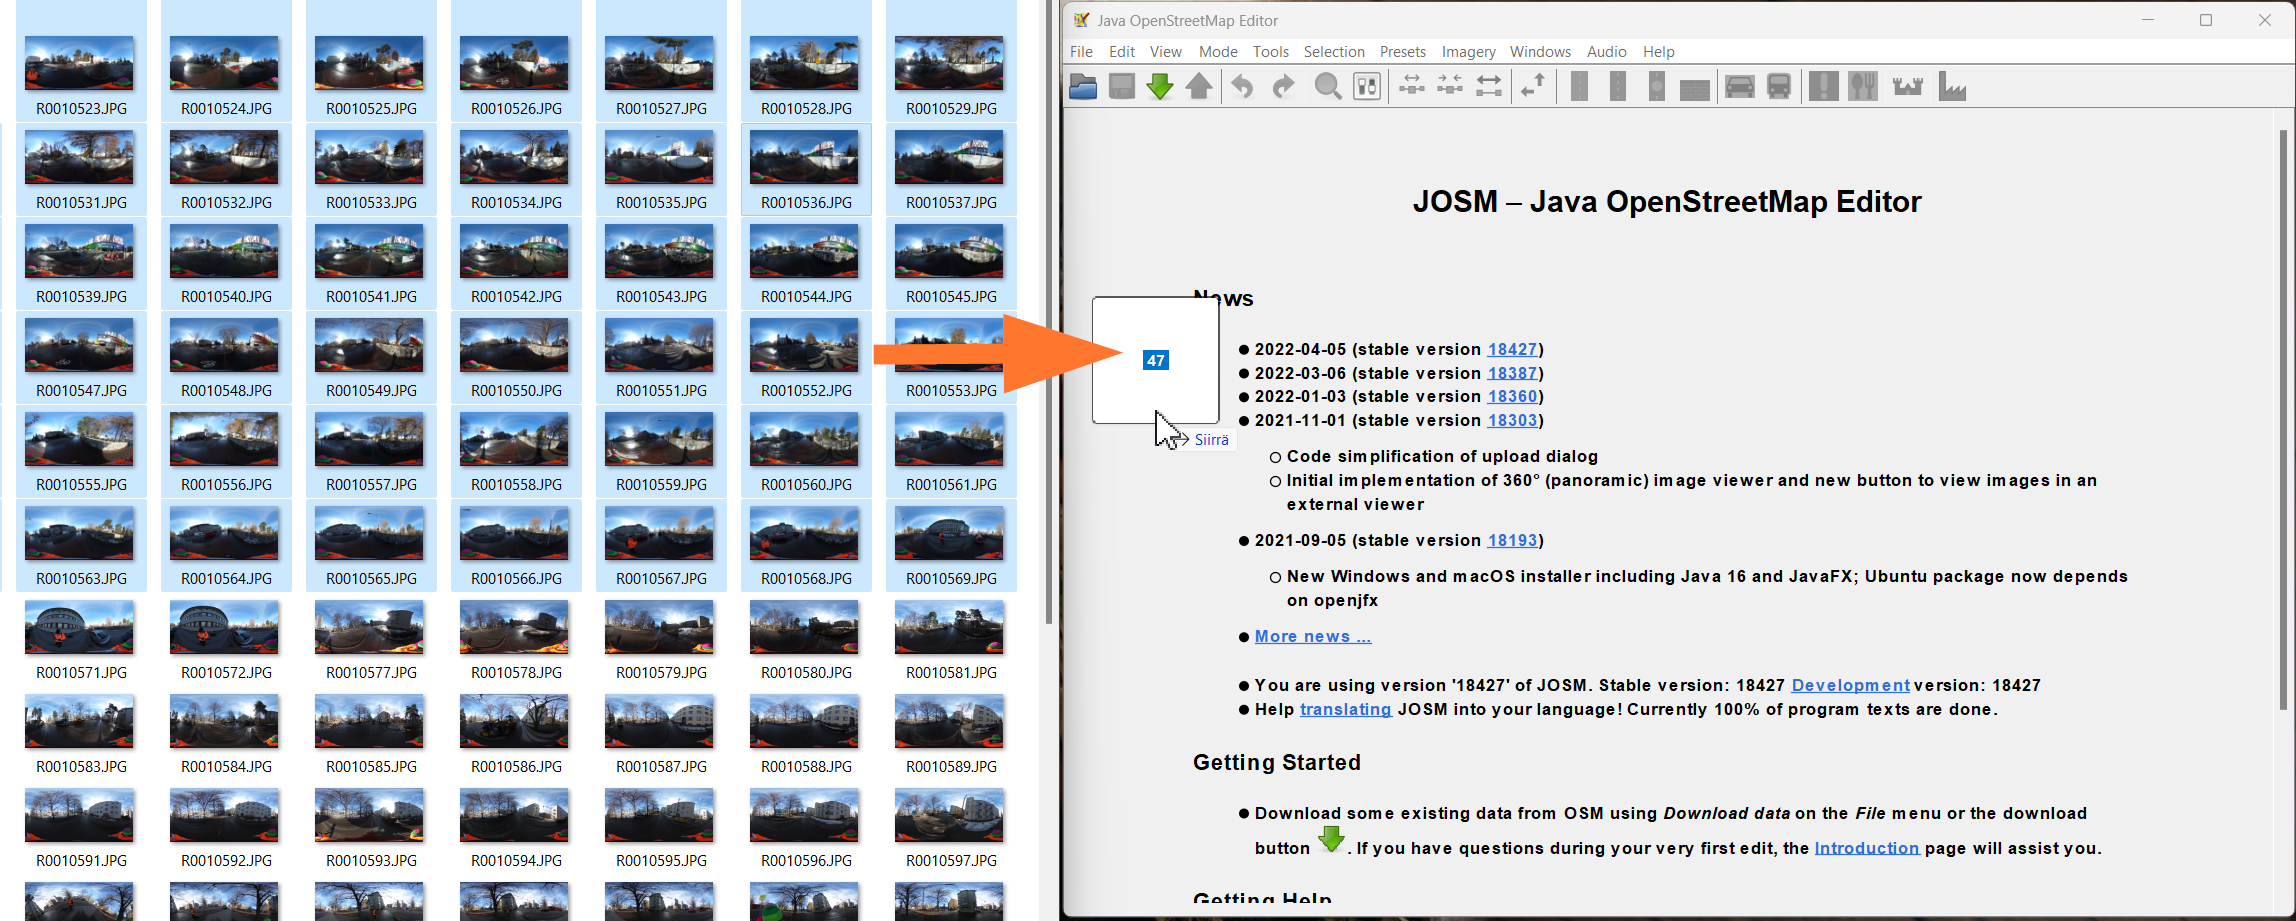
- Drag and drop your photos into the middle of JOSM
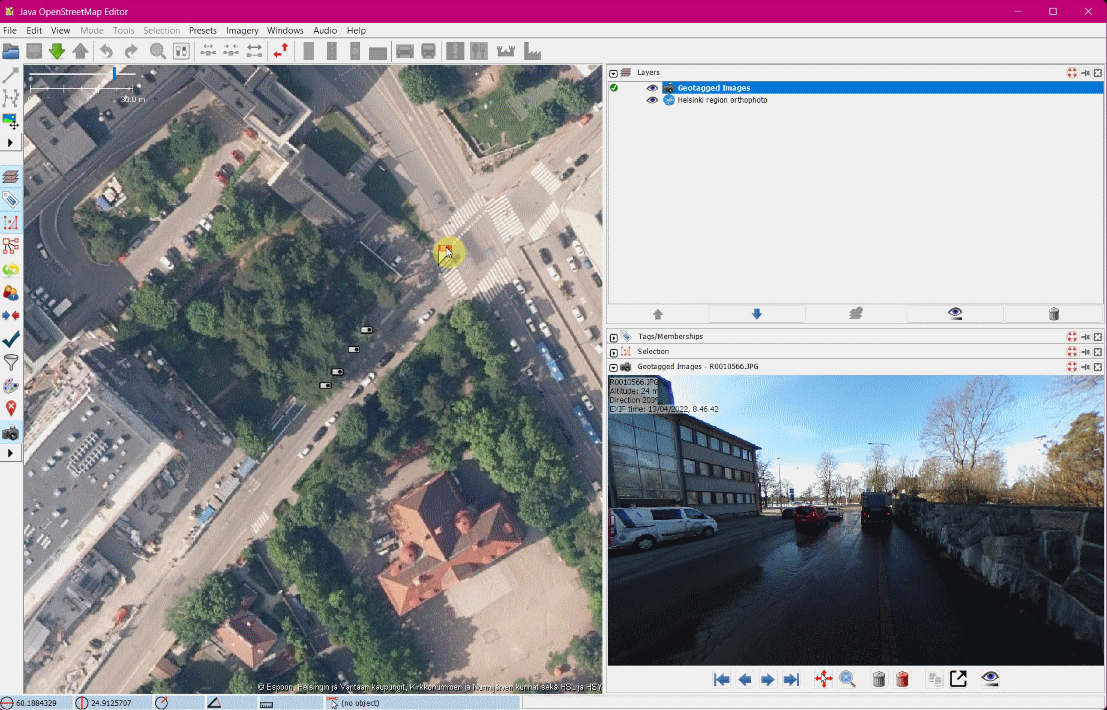
- Add a base map from Imagery. Select the most accurate map or Aerial image from the list. You might even find local maps (e.g. the Helsinki region orthophoto).

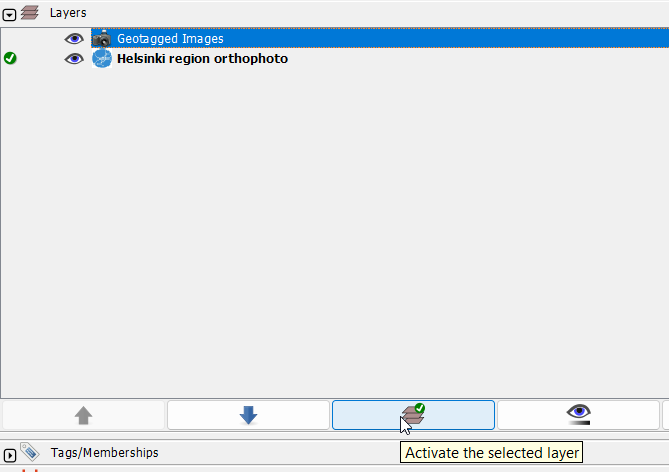
- Select the Geotagged Images from the Layer list and click on the Activate selected layer button
- Select the photos from the map and drag them to the right location
- If this doesn’t work, please restart JOSM and try the steps again from the start.
- Tip! Keep Shift button down to select multiple photos at once.

- You can also change the camera orientation by keeping control down and clicking on the map in the right direction
(Tip: Keep Shift down first to select multiple photos at once. Then click Control and click on the map to change the orientation for all photos at once.)

- If you need to change the altitude of the images, you can do it one by one. Select one image, then click on Edit > Edit photo GPS data
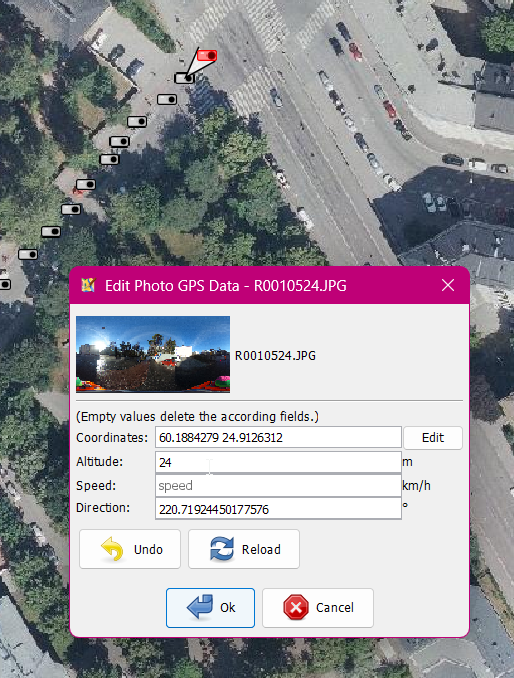
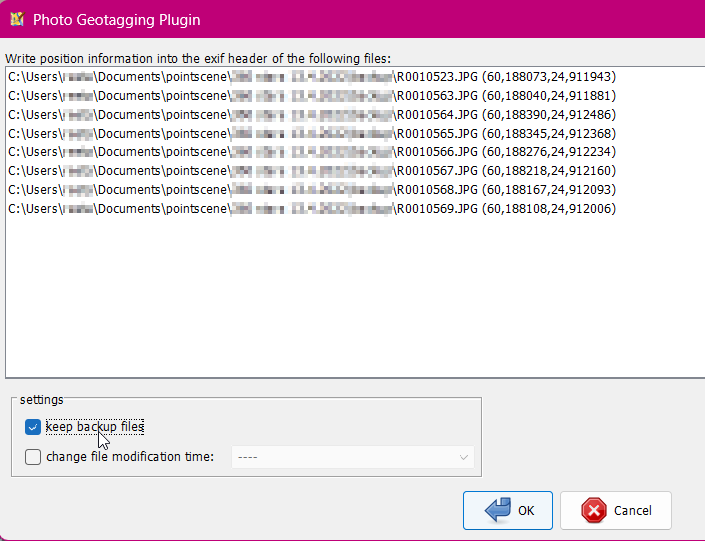
- Once the photos are in the right location right-click the Geotagged Images and select Write coordinates to image header

- You can keep backup files or write directly onto the original files. Click OK and save the images.
Upload 360° photos to Pointscene
Once the photos have new locations, you can add them to Pointscene for other users to see them.
- Open your site (right top corner), go Options then Upload files and select 360° photo.
- Drag and drop or select your newly adjusted photos.
- Provide a date and a name for the photo collection. All photos upload at once will be grouped together.
- Click Upload and make sure your photos are in the right place on the map
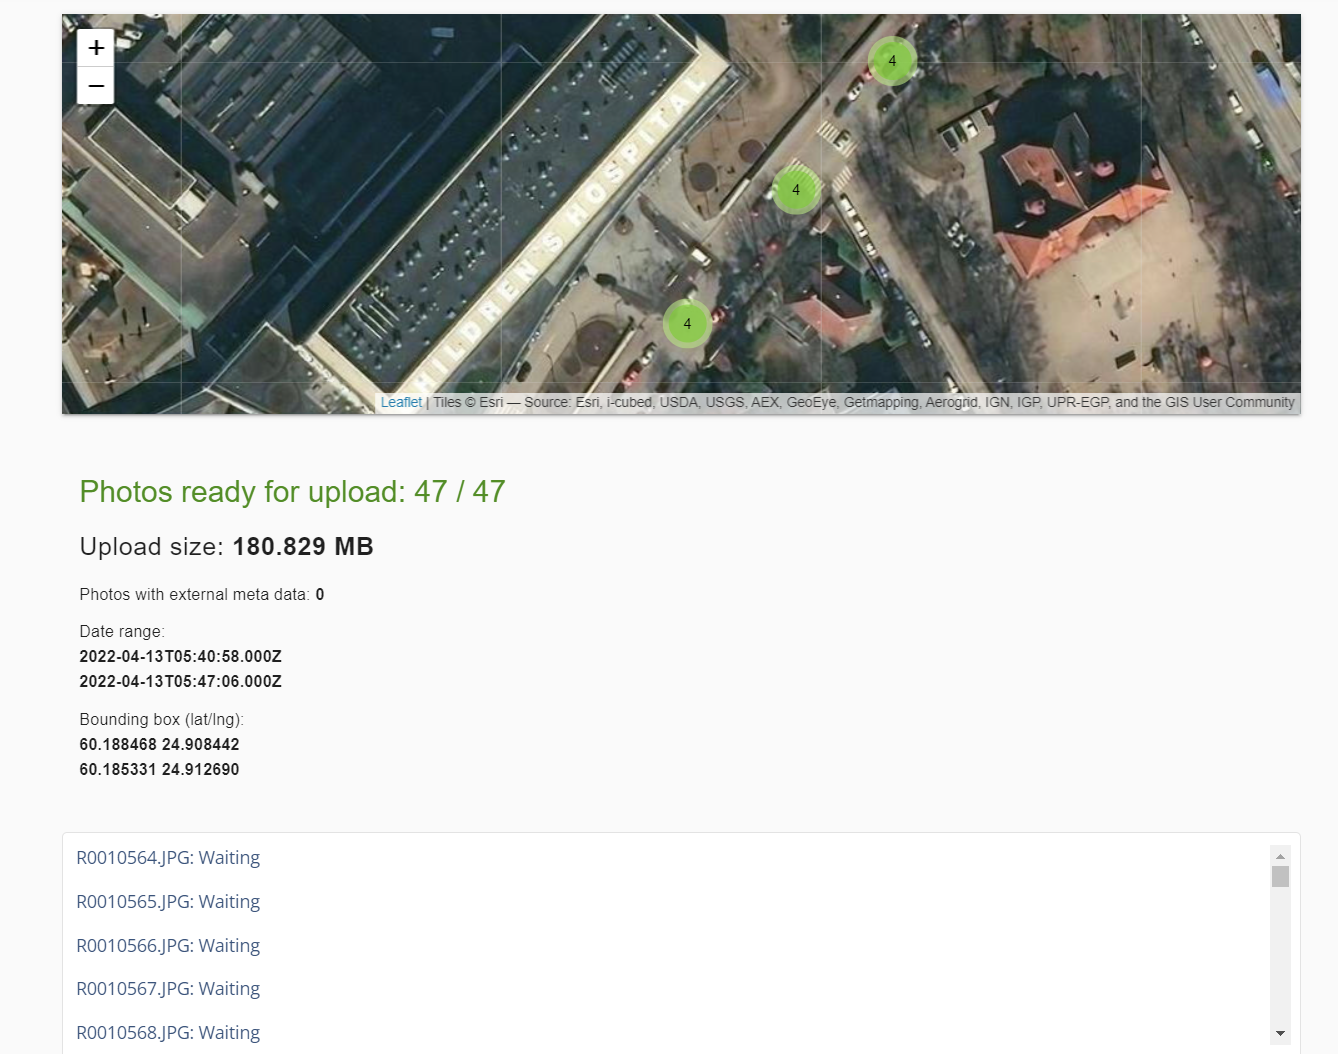
- Click upload and you are ready to go!